Sunday, November 29, 2015

Apple Bruschetta with Pumpkin Butter


I like this dish. As an appetizer, it satisfies your sweet tooth. As a dessert, it's a refreshing change from very sweet recipes we are used to and would go well with a little port. You can also swap out the caramel sauce with goat cheese, as an example, to inject a little savoury in with the sweet.  If you're wondering what to do with the leftover pumpkin butter, milkshakes and ice cream sundaes come to mind, but there are a number of other great ideas here:  http://www.foodandwine.com


Pumpkin butter

  • 2 cups pureed pumpkin
  • 2 T apple juice
  • 1/2 cup brown sugar
  • 1/2 T ground cinnamon
  • 1/4 T ground nutmeg
  • 1/2 t vanilla
  • 2 T maple syrup
  • dash of salt

Apple Bruschetta

  • 1 baguette, sliced
  • 3 granny smith apples
  • 1/2 t cinnamon
  • 1/8 t nutmeg
  • 1/4 cup brown sugar
  • 1/2 T butter
  • 1/2 cup caramel sauce 

Pumpkin Butter

Combine all ingredients in your blender. If you have a Vitamix, run the ingredients through the smoothie setting once, then with a spoon, stir the ingredients and run it through the smoothie setting again. If you're working with a traditional blender, blend for 30 seconds on low speed, another 30 seconds on medium and 30 seconds on high speed for two rounds. Pour the blended ingredients into a pot and bring to a low boil. Reduce heat to low and let simmer for ten minutes with the lid ajar. Remove from heat and let cool.

Apple Bruschetta

Preheat oven to 350F. Place the baguette slices on a baking sheet and bake for 10 minutes. Remove from oven and set aside.

Peel, core and dice the apples. In a bowl, combine the apples with the cinnamon, nutmeg and sugar, ensuring the apples are well coated with the other ingredients. In a small pot, melt the butter and add the apple mixture. Sauté the apples for about 6 minutes, stirring occasionally. The apples should be cooked, but not mushy.

Spread a thin layer of the pumpkin butter on the baguette slices. Add a spoonful of the apples on top and drizzle with caramel. 


Saturday, November 28, 2015

Chocolate Cupcakes with Peppermint Frosting


Baking shmaking!! I can put together a basic cake and a few squares, but delicate pastries and other French concoctions take patience, practice and timing. Meh. The cupcake, however, can be pulled off by a more careless and aloof baker. If the cake winds up tasting like sandbox, you can always load on a lethal amount of icing as a cover up.

My stand mixer gathered dust for about 10 months this year. A few weeks ago, I finally pulled it out to try my hand at some Christmas baking and have had some good results so far. This recipe is one of those results and I encourage you to try it out. If peppermint isn't your thing, I made a similar batch of cupcakes with two teaspoons of Bailey's Irish Cream creamer and a teaspoon of espresso (prepared with water, that is) and some instant espresso grounds sprinkled on top.  I found the icing a little wet, which didn't give me the decorative look I was hoping for. If you want a better looking topping for your cupcakes, you'll need to add more icing sugar to get that result.

From: http://www.myrecipes.com/

Makes 12 cupcakes

Cupcakes

  • 1 cup brown sugar
  • 6 T unsalted butter, softened
  • 2 large eggs
  • 1 1/4 cups all purpose flour
  • 1/2 cup cocoa
  • 1 t baking powder
  • 1/2 t baking soda
  • 1/2 t salt
  • 1/2 cup buttermilk
  • 1 t vanilla extract

Peppermint Icing

  • 2 cups powdered sugar
  • 1/2 cup light tub-style cream cheese
  • 1/8 t peppermint extract
  • 12 hard peppermint candies, crushed


*I had to double the icing recipe to get enough icing to pipe on to the cupcakes. If you opt to spread the icing on with a knife, you won't need to double your quantities.

Method

Preheat oven to 350F. Place brown sugar and butter in a stand mixer and mix until smooth. Add eggs, one at a time until combined. Combine the dry ingredients in a bowl. Add the dry ingredients in stages to the mixer, alternating with the buttermilk. Once all combined, pour the batter into individually lined cupcake tins. Bake for 12 minutes. To test, poke the centre of a cupcake with a toothpick. If done, the toothpick should be clean.

For the icing, blend all ingredients together. Spoon the icing into a plastic bag and cut the tip off of one corner of it. Squeeze the icing onto each cupcake.

Monday, November 2, 2015

Buckwheat & Coconut Muffins


Count 'em down, folks! We're seven weeks away from the most body-punishing event of the year: Christmas. I'm already hyped up on Halloween candy and pumpkin pie. Now comes the downward spiral of unwinding..or unraveling with cinnamon rolls, chocolates, christmas cookies, eggnog and liquor.  By January 2nd, I'll feel like I've been hit by a sugar truck.

This muffin recipe is low in sugar and a candida diet favorite. Candida is a yeast that grows naturally in the intestine. Excess consumption of sugars and yeast can apparently spark its' overgrowth, which some natural medical practitioners link to a myriad of symptoms, from bladder and yeast infections to acne and fatigue. 

According to the Mayo Clinic, there isn't much scientific evidence to support this ailment which could either mean not much research has been done and/or the research wasn't conclusive. Whether candida overgrowth is a real condition or not, consuming less sugar and processed foods in one's diet is supported by both the science-based and alternative medicine fields and I'm heeding their advice.

I've been eating these with Greek yoghurt in the morning. Ruedi added sliced banana and dried cherries to his serving today. Also remember to buy the unsweetened versions of the ingredients below.  I know the coconut was available sweetened, as was the almond milk. If you want a little more sweetness to the muffin, I would double up on the stevia instead.  I vow to feel a little better this Christmas. Lord knows there will still be plenty of opportunities to overdo it. 


Makes about 15 muffins

Ingredients
  • 2 cups buckwheat groats
  • 1/2 cup coconut flakes
  • 1/4 cup pumpkin seeds
  • 1/4 cup walnut pieces
  • 2 T chia seeds
  • 1/4 cup flax seed meal
  • 1 t cinnamon
  • 1/4 t salt
  • 2 eggs
  • 1 1/2 cups almond milk
  • 1/4 cup of almond butter
  • 1.5 t stevia
  • 1 T alcohol free vanilla

Method

Preheat oven to  375 F.  Oil or butter a 12 cup muffin pan and set aside.  Soak the buckwheat groats in water will a pinch of salt for 6-7 hours or overnight. Drain and rinse thoroughly. Mix all dry ingredients except the stevia in a bowl. Mix all wet ingredients and the stevia in a bowl and whisk until frothy. Combine the wet and dry ingredients and spoon a third of a cup of the mix into each cup of the muffin pan. Bake for about 20 minutes or until muffins are brown around the edge and firm to the touch.


Sunday, October 18, 2015

Sausage & Bean Cornbread Skillet


Aaaaah, the magic of the one-pot meal...or, the ease of it. Either way I love doing fewer dishes and having leftovers.

This recipe, like most of the ones I choose offers a number of options to substitute. The cornbread mix can be swapped out for a biscuit mix if preferred or the filling can be vegetarian if you trade the sausage for more beans or lentils. I like it just as is, with the sausage and cheese combination, but this likely comes as no surprise.

I'm not sure how my addiction to sour cream evolved, but I serve dishes such as this one with a little spoonful of it because I like the cool, tangy balance it brings to spicy dishes. Perhaps I can persuade you to get on the sour cream bandwagon too.

Adapted from: http://spicysouthernkitchen.com

Serves 6

Ingredients

Filling

  • 8 smoked sausages, cut lengthwise and then into 1/4" slices
  • 1/2 cup chopped onion
  • 1/2 cup chopped red bell pepper
  • 1 clove garlic, minced
  • 2, 15 oz cans black eyed peas, drained
  • 1 15 oz can of chicken broth
  • 1/2 tsp Tabasco sauce (if you like heat, that is)
  • 1, 10 oz package of frozen spinach
  • 2 T finely chopped cilantro


Cornbread Top

  • 1 1/2 cups, plus 6 T cornmeal
  • 2 T baking powder
  • 1 t salt
  • 2 t sugar
  • 1 1/3 cup buttermilk
  • 1 egg beaten
  • 1/4 cup olive oil
  • 1 cup shredded cheddar cheese


Method

Preheat oven to 400F.  Brown the sausage, onion and pepper in a 12-inch cast iron pan for about 3 minutes. Add the garlic and cook for about 30 seconds. Follow with the remaining filling ingredients except the cilantro and simmer, uncovered for 10 minutes.

For the cornbread mix, combine all the dry ingredients into a bowl and mix well. Add the buttermilk, egg and oil and stir until all the ingredients are combined. Fold in the shredded cheese and stir until well combined.

Spoon the cornbread mix over the filling in the cast iron pan, leaving a hole in the centre of the pan. This allows the bread to cook more evenly. Cook the skillet in the oven for 30-40 minutes, or until the cornbread is lightly browned.


Saturday, September 19, 2015

Butternut Squash, Leek, Feta, Spinach & Pine Nut Quiche


I had stretched myself thin the other day and needed backup badly. Ruedi wound up making the quiche pastry and then the quiche filling for this post and the result was magnificent. Maybe all the more so because I didn't make it myself. 'Tis good not to be the only cook in the house. Now if I could just get Cat to vacuum, I'd be set.

This recipe was intended to be crustless, but I dig crusty quiches, so we had one with and one without.  Take advantage of whatever you have in the fridge that needs to be used up as alternative ingredients. This is why quiches are such favourites: there are so many options as far as ingredient combinations.  Make a big salad to accompany it and pat yourself on the back for having created a light, but gourmet meal. Then proceed to dig your secret stash of brownies out of your bedside table and pound them back after dinner to help balance your chi.


Filling Adapted From: http://bibbyskitchenat36.com

Crust From: http://www.food.com

Serves 6-8

Ingredients

Crust

  • 1 cup flour
  • 1/2 t salt
  • 1/4 cup olive oil
  • 1/4 cup ice water

Filling

  • 3 T olive oil
  • 2 cups roasted butternut squash
  • 1 shallot, sliced
  • 2 leeks, chopped
  • 200g spinach leaves
  • zest and juice of half a lemon
  • pinch of nutmeg
  • 6 eggs
  • 1/4 cup of milk
  • 1 t wholegrain mustard
  • 1/2 t oregano
  • 1/3 cup mature white cheddar
  • 100g feta
  • handful of pine nuts
  • salt and pepper

Method

Crust: Mix the flour and salt together with a fork. Beat oil and water with a whisk or a fork to thicken. Pour into flour and mix with a fork. Press into a 9" pie crust. Bake for 10 minutes at 350F and then remove from heat.

Filling: Preheat oven to 400F. Peel and cube the butternut squash. Toss with 2 tablespoons of olive oil, salt and pepper and place on a baking sheet. Roast in the oven for 20 minutes. Remove from heat and set aside.

Heat a pan with a tablespoon of oil. Add shallot and saute for 2 minutes. Add the leeks and let cook until soft. Toss in the spinach, allowing to wilt and then follow with the lemon, zest, nutmeg, salt and pepper.

In a bowl combine the eggs, milk, mustard and oregano. Add a pinch of salt and the grated cheese, combining well.

Place half of the squash in the bottom of the crust-covered pie pan and the other half in a pie pan without crust that has been greased with a little olive oil. Follow with the spinach and leek mix in both pans and then the egg mixture. Top with crumbled feta and the pine nuts. Bake at 400F for 30-35 minutes.


Friday, September 11, 2015

Don't Fear the Vegan: Cheezy Quinoa & Chick Pea Skillet with Heirloom Tomatoes

When I found this recipe, I went back to my blog to compare it with my other vegan recipes and...


Well, there wasn't much there. I have a vegetable side dish and a creamed soup made with coconut milk.

I truly am on the 'eat less meat' bandwagon. I got on it a long time ago and have found some delicious vegetarian recipes while appreciating a low-cost meal by comparison to many of my meat-filled options. It's just that the bandwagon has so many great detours through steak village and sausage alley. I get distracted!

This one got my attention though, because as I read through the recipe, I figured it had a shot at being flavourful. For one, the basil, tomato and balsamic topping is a favorite combination in this household. It's fresh and chalked full of dynamic tastes. The second sign was that the two neutral components are well seasoned before they're combined. The quinoa is salted and mixed with nutritional yeast and the chick peas are toasted and seasoned with an interesting mix of paprika and maple syrup.

Finally, I've read about nutritional yeast and wanted to try it. For those of you who know about as much as I did a week ago, it's a pure form of yeast grown for its' nutritional value. A tablespoon's worth has about 8 grams of protein and 4 grams of fiber. It's also a good source of magnesium and a host of other nutrients (http://bestnaturalfoods.com/nutritional_yeast.html). It has a lovely umami flavour and often binds ingredients like cheese does.

Try it. I enjoyed it, Ruedi enjoyed it, it was an easy weeknight meal to prepare and it goes great with bacon! I'm kidding...kind of.


From:  http://kblog.lunchboxbunch.com

Serves 4-6

Quinoa

  • 1 1/4 cup quinoa
  • 2 cups water
  • 1 t salt
  • 1/2 cup nutritional yeast

Chick Peas

  • 3 cups cooked chick peas (if you're buying them dried, I've made some notes below)
  • 1 t paprika
  • 2 t maple syrup
  • 1/2 t ground pepper
  • salt to taste
  • 2 t olive oil

Tomato

  • 2 cups fresh chopped tomatoes
  • 1/4 cup fresh chopped basil
  • 2 T balsamic vinegar
  • 2 cloves garlic minced
  • 1/2 t red pepper flakes
  • 2 T lemon juice


Method

Quinoa: Boil the water and add the quinoa and salt, covering the pot and simmering for 10 minutes. Turn off the heat and allow the quinoa to sit for another 10 minutes, still covered. Remove the lid and fluff the quinoa with a fork. Mix in the nutritional yeast and set aside.

Chick Peas: If you are using dry chick peas, rinse and soak them in a pot overnight, and then cover and simmer them for 45 minutes. This will give you a chick pea akin to the canned variety. Heat the olive oil on medium heat. Toss in the chick peas, coating them with the oil and letting the chick peas toast for a few minutes. Add the paprika and stir well. Pour in the maple syrup and toss with a little salt. Set aside.

Tomatoes: Combine all ingredients in a bowl.

Together: Toss a few spoonfuls of chick peas in with the quinoa. To serve, pour the quinoa on to a platter and spoon the remaining chick peas on top. Add the tomato mix on top of that and sprinkle a little sea salt over the entire platter.


Sunday, September 6, 2015

Khow Suey: Burmese Noodle Soup


Check out my bowls for a minute. Yes, I said my bowls! BOWLS!! Home Sense, people! Get on it!

On to the subject of this post: Khow Suey.  Apparently Khow Suey is an egg noodle dish served with either curried chicken or beef, coconut milk and an assortment of condiments. This particular version is more of a soup with a number of colourful vegetables in it. While it has deviated somewhat from its roots, it looks and tastes like a hot damn.

Wait for it......


Another bowl shot! Those colourful vegetables sure compliment my lovely new bowls.

On the subject of colourful vegetables, my friend Scott started growing peppers on his patio this year. His interest in all things pepper-related got a little out of hand, as his patio and indoor plant growing operation could be a candidate for the next episode of Hoarding: Buried Alive. One night, we were rummaging through the fridge looking for a snack and wound up preparing a dish of cheese, crackers and sliced jalapeños. I tried not to be impressed, but the flavour combination was pretty terrific. Now I can't seem to get enough of the hot stuff in almost everything I prepare. I can't eat enough heat.

I wouldn't call this dish a hot number, but there is plenty of opportunity to heat things up. Garnishing each serving with jalapeños is a great way to use up the insane number of chili peppers I seem to have on hand. The coconut-curry combination helps combat the heat and just compliments the flavour altogether.

Whether heat is your thing or not, Khow Suey offers a wholesome chicken and vegetable soup with a ton of dimension. Frankly, nothing will make your new bowls 'pop' in photographs quite like it either.

Adapted from: http://www.spicechronicles.com

Ingredients
  • 2 T vegetable oil,
  • 1 medium red onion, chopped
  • 2 cloves of garlic, minced
  • 1T fresh ginger, minced 
  • 1/2 lb boneless, skinless chicken breast, cut into bite-size pieces
  • 2 t dried coriander powder
  • 1 t cumin
  • 1/2 t turmeric
  • 1 t cayenne pepper
  • 1/2 cup pureed tomatoes
  • 2 T tamari
  • 750ml chicken broth
  • 250ml coconut milk
  • juice of one lime
  • fresh cilantro, chopped
  • rice noodles

Method

Heat the oil in a large saucepan and add the onion, cooking until soft, about 5 minutes. Add the garlic and ginger and sauté for about 2 minutes. Add the chicken and spices, cooking until no longer pink, about 3 minutes.  Add the tomatoes and tamari and combine well. Pour in the broth and coconut milk and simmer for about 5 minutes. Squeeze the lime juice into the pan and pour in the chopped cilantro.

Boil 3 cups of water in a large pot. Add rice noodles and simmer for two minutes. Use a set of tongs to remove the noodles and place them in serving bowls. Ladle portions of the soup on top and add handfuls of cilantro and sliced jalapeños to garnish.


Sloppy Cabbage Rolls


Yes, 'tis the season. I'm working my way out of the salad scene and into warm meals to complement the fall weather. Prepare yourself for soups, casseroles and everything cozy.

I can't say I've ever been sold on cabbage rolls, but I'm also not much of a connoisseur on the item. I did, however, have an enormous cabbage given to me and no interest in making five different types of coleslaw to use it. Pickling the thing was an option, but I wasn't up for that either. Given our current weather situation, this warm and easy one pot dish sounded like just the ticket. I spiced it up with some Worcestershire and Chorizo to enhance the recipe's subtle flavours. Depending on your cabbage size, this dish could wind up serving ten to twelve. It should freeze well, but I didn't get the chance now that the Ruedi-vac has returned.

If you're on a low-carb diet, eating this dish on its own would make a good meal. I served it with some roasted buckwheat that I found at the Italian Centre (now with a location in South Calgary!). Yes, I'm as surprised as you to come across yet another grain I haven't cooked with. Of course, rice or potatoes are another option.

I'm also surprised by how ready I am for fall when it arrives, as it means the end of summer, another favorite season that zips by quickly. It has to be the return to a reliable and healthy routine that I need so badly by the end of August.  Cooking regular, healthy meals are part of that routine.

Adapted from: http://www.passthechallah.com/unstuffed-cabbage/

Serves 8

Ingredients

-1 T olive oil
-1 small cabbage, chopped
-2 cloves garlic, minced
-1 onion, diced
-11/2 lb ground beef
- 300g chorizo, peeled (usually covered in paper) and sliced
-1, 28oz can diced tomatoes
-1, 14oz can tomato sauce
-1 T apple cider vinegar
-1/2 t salt
-3/4 t ground pepper
-2 T sugar
-2 T Worcestershire sauce
-1 T sugar
-juice of 1/2 lemon
-1 cup chopped flat leaf parsley

Method

Heat the oil in a large sauce pan on medium heat. Add the onion, stirring occasionally for about 4 minutes. Make a hole in the centre of the pan and add the garlic, letting it sit until its' aroma is released. Add the ground beef, breaking it up and cooking it until it has browned; about 5 minutes.

Add the cabbage, tomatoes, vinegar, salt, pepper and Worcestershire to the pan, combining well with the existing ingredients and simmering for 45 minutes with the lid ajar.

Once cooked, add the sugar and lemon juice and continue to simmer for another 5 minutes. Serve topped with the chopped parsley.


Monday, August 24, 2015

Rge Rd Farm Dinners


This is year 5 of Rge Rd's Farm Dinners, hosted at Nature's Green Acres adventure farm. We had chilly weather and a lot of wind, but hunkered down in tents and wrapped ourselves in blankets whilst sipping boozy ice tea in anticipation of good eats. 'Twas lovely.

 A little beef carpaccio, pate with pickled beets and sausage with grainy dijon kicked off the evening. With pork smoking nearby we dove onto wood boards lined with mixed greens, flowers, pickled beans and other veg drizzled with milk thistle vinaigrette.

Then came the meat....

Chicken
Pork
Beef


The chicken was accompanied by baby potatoes and a subtle onion puree.


The pork smoking prior to dinner was a cut of loin and belly rolled with herbs into a wanna be roast. The skin crisped up like bacon angels and accompanied each serving along with broad beans and roasted onions. Beef tenderloin followed with a light chimichurri and a root vegetable gratin. What's that fancy stuff on top you ask? A carrot mousse! A meat celebration it was and I was loving it!


This is an eclair ----->

It's what I ate for dessert, filled with raspberry and honey cream, a spoonful of mint mascarpone and a little streusel to accompany it. 


Hats off to the staff of both Rge Rd and Nature's Green Acres who worked tirelessly to pull off this event. Serving a 75-person meal is enough of a challenge, but the crew cooked and plated it outdoors in unusually chilly weather. Canadian booze flowed throughout the evening piss-strong cowboy coffee wrapped it up. I get juiced about good local food and drink. Rge Rd covered some of the best Alberta has to offer and prompted me to dream up a few kitchen ideas of my own. The only thing that could have made this night better would be cats; lots and lots of cats. 


Nailed it!

Wednesday, July 29, 2015

Meaty Cobb Salad...with Meat in it.


If you're as desperate as I am to get more meat into your diet, don't ignore the almighty salad. A double dose of meat here can easily be tripled if your beef deficient, but I'm keen on the two-tone selection of chicken and pancetta Jamie Oliver's chosen, although I did double up on the chicken.

We used to summer in the Hamptons Spokane during Nordstrom's summer sale season. During my Dad's frequent power breaks between transactions, he'd head to Nordstrom's cafe for a wedge salad covered in blue cheese dressing. I just didn't get it. Why would you eat something that's clearly gone bad?! Now I can't get enough of the stinky stuff.  Substitute the dressing for another creamy variety if preferred, but note that you won't be able to shop as hard as you would with the powers of Stilton in you. As you wish.

Adapted from: http://www.jamieoliver.com/

Serves 6-8

Ingredients

  • 1 head Romaine lettuce
  • 2 handfuls of mixed greens
  • 2 tomatoes, sliced in wedges
  • 4 green onions, chopped
  • 3 eggs
  • 2 avocados, sliced in wedges
  • 2 ripe tomatoes, sliced in wedges
  • 2 ears of corn
  • 4 chicken thighs, skin on
  • olive oil
  • paprika
  • sea salt
  • 50 g pancetta
Dressing
  • 50 g Stilton
  • 1/2 bunch fresh chives
  • olive oil
  • 50 ml buttermilk
  • 2 T Greek yoghurt
  • juice of 1 lemon
  • 2 t Worcestershire


Method

Heat your barbecue to medium-high. Prepare the chicken by sprinkling the thighs with a generous dose of paprika, sea salt, pepper and a few lugs of olive oil on both sides. Place the chicken thighs, skin side down on the bottom grill for about 10 minutes on each side. Once cooked, remove from the barbecue, place the pancetta around the thighs and return to the heat for about 5 minutes each side. Check to ensure the thighs' centres are cooked through before removing them permanently from the heat. If you don' t have a barbecue, bake the thighs in an oven for 25 minutes at 350 degrees F, remove and wrap them in the pancetta to be returned to the oven for another 10 minutes. Remove from the heat and let cool completely. Once cooled, chop up the chicken into bite sized pieces and set aside.

The corn can be prepared a number of ways, but if you're barbecuing the chicken, strip the cobs of their skin and rub a small amount of olive oil all over them. Wrap them in foil and grill them on the top rack for about 15 minutes. I unwrap them near the end end place them directly on the bottom grill for about 3 minutes to blacken some of the ears. Alternatively, you can boil the corn for 5 minutes or use the frozen variety.

To cook the eggs, heat a pot of water until almost boiling. When the water's about to boil, add the eggs and set your timer for 6 minutes. This will get you a soft boiled egg assuming the eggs were refrigerated prior to being boiled. Add another 2 minutes if you prefer a hard-boiled egg. Once you've reached your desired time, remove from the heat, dump the water and replace with cold water to stop the eggs from cooking.

For the dressing, begin by crumbling the Stilton into a jug or container. Chop the chives and add them to the jug. Follow with the remaining ingredients and whisk well until all combined. Refrigerate until ready to use.

To prepare the salad, wash, dry and tear the Romaine leaves into bite-sized pieces. Combine with the mixed greens in a large salad bowl. Strip the corn from their ears and distribute on top of the salad along with the sliced tomatoes and avocado. Add the sliced chicken and peeled/halved eggs as well. I included some of the remaining chopped chives in the salad and dressed each portion individually. Don't forget that crusty bread and a little beer to accompany your healthy meal!!


Tuesday, July 14, 2015

Rhubarb Ice Cream


I'm having second thoughts about not putting "no ice cream maker required" in the title, but it seemed like a lot of information for a title. This was on the June cover of Chatelaine magazine and the link to their site for further ice cream flavours is below. Next round will be the salted caramel.

The recipe only calls for cream, sweetened condensed milk and a vanilla bean as the base. Place these in a standing mixer for four minutes and then freeze it for at least six hours. If you want a flavour other than vanilla, Chatelaine provides some interesting options to choose from. What I found with my first batch was a mixture with a lot of ice crystals in it. The result tasted more icy than creamy. Apparently the faster you can freeze the product, the fewer ice crystals will form in it. With the next batch I mixed the ingredients together, put everything in the freezer for five minutes, including the mixing bowl and then mixed it for the allotted time. Once the recipe was transferred back into a storage container, I placed it in the freezer and mixed it periodically with a whisk as it froze. The result was more in line with the texture I am familiar with.

Rhubarb offers a fresh take on this little number. The stuff grows like a weed in this province and I find people are more than happy to get rid of it. The tart and sweet combo's a winner for me.

Adapted from: http://www.chatelaine.com

Serves 2-3

Ingredients

  • 2 cups finely chopped rhubarb
  • 1 cup 33% cream
  • 150 ml of sweetened condensed milk


Method

Place a pot on medium heat to warm it. Add the rhubarb, mixing it well to let the water evaporate from it. Increase the heat to a medium-high temperature and keep stirring for about 3 minutes or until the rhubarb is mushy. Set aside and let cool to room temperature.

Place the cream and condensed milk in the bowl of a standing mixer. Place the bowl and contents in the freezer for 5 minutes. Once chilled, mix the ingredients for about 4 minutes. Transfer the ice cream mix into a storage container and freeze for at least 6 hours before serving.

Saturday, July 11, 2015

Monkfish with Olive Paste & Lemon Mash


With Ruedi's return to YEG, we have quickly settled into a few habitual affairs; one of them being a Saturday visit to the City Market Downtown. Fresh fruit, eggs and pastry to tide us until lunch are the usual takeaways. This time we cruised by Ocean Odyssey Inland which sells wild seafood, including a wide array of fish from Iceland. We picked up a few small pieces of Monkfish for dinner; pricey little numbers, but they have a hearty texture I really enjoy. If Monkfish isn't an option for you, you can still pull this recipe off with other white fish. The original recipe courtesy of Jamie Oliver includes a rub of rosemary and lemon zest for the fish, but I ran out of time and figured the fish would be lovely either way. I used less fish than the recipe calls for and ended up with quite a bit of leftover olive paste. The extra I combined with a rice and lentil mix topped with cilantro, avocado and tomatoes for my lunches. Worked quite well, thank you.

If you live in Edmonton and haven't been to the City Market, I highly recommend a visit. We often go just to people watch since there's usually a good turnout in the summer. The market moves outdoors between the May and Thanksgiving long weekends on 104th Street between Jasper Ave and 103rd. Be sure to pick up a few gougeres at Dauphine to keep your strength up during your visit.

Adapted From: http://www.jamieoliver.com

Serves 4

The Fish

  • sea salt
  • 4, 200g Monkfish fillets
  • olive oil

Olive Paste

  • 2 handfuls of black, pitted olives loosely chopped (I chose Kalamata)
  • 1 fresh red chili, minced (had orange Habaneros, but red chili would be best)
  • handful of fresh herbs finely chopped (basil, cilantro, parsley)
  • 1 heart of celery, minced
  • 1 clove garlic, minced
  • juice of 1 lemon
  • freshly ground pepper
  • a few swigs of olive oil
  • balsamic vinegar to taste

Lemon Mash

  • 1 kg of russet potatoes, peeled and chopped
  • sea salt
  • butter
  • ground pepper
  • milk 
  • juice of 1 lemon

Method

To prepare the fish, salt it in advance and let it sit for at least 30 minutes to allow the juices to release. Heat barbecue grill on high (400F). Place fillets on grill and cook for  2-4 minutes each side. Ours were about an inch thick and took 4 minutes each side, but you'll want to gauge your time carefully. The meaty texture can take a little more abuse than lighter fillets of fish, but over cooking fish is easy to do.

To make the olive paste combine all the ingredients and set aside. When ready to serve, taste the mix and add a little of the balsamic vinegar if a little extra kick is needed.

For the mash, heat a large pot of salted, boiling water. Add the potatoes and let cook for about 15 minutes, or until they can be pierced easily with a fork. Remove from heat and dump the water. Add a hearty nub of butter, about a half cup of milk and the lemon juice and blend with a hand mixer. Do not over mix the potatoes! They become starchy if blended for two long. Add more milk and butter to get your desired texture and salt and pepper to taste.


Monday, June 29, 2015

White Sangria Infused with Basil & Peaches


This is one of those 30 degree summer afternoon cocktails you're looking for. Crisp and tangy with a little sweetness too. I've had traditional sangria, but wanted white wine as my base; red wine gives some of my taste testers a headache.

I used a 1/4 cup of sugar in this mix, but I'd start with less next time. For this recipe, I recommend a few tablespoons to the alcohol first and then adding more if you prefer it a little sweeter.

As for the herbs, muddling the basil helps to combine its flavour with the alcohol. I used the back of a spoon to pressure the leaves a little. If you compress or crush them too much, you'll end up with a bitter taste.


Serves 4-6

Ingredients

  • 1, 750 ml dry white wine
  • 2 oz Calvados
  • 2 T lemon Juice
  • 2 T granulated sugar
  • 1 bunch basil leaves 
  • 1 peach, thinly sliced

Method

Pour a bottle of white wine, the calvados and lemon juice into a pitcher and mix well. Add the granulated sugar as desired and stir until dissolved. Add the basil and muddle it a little in the pitcher. Add the peach slices and chill for at least an hour before serving.

Sunday, May 31, 2015

Apricot, Rosemary & Garlic Pork Skewers


These apricot, rosemary and garlic pork skewers are the perfect kind of entertainment food and since I was having a party for one tonight, I dove right in. The marinade and marinating can be completed in advance. All that's left when company arrives is putting the pork on skewers and throwing them on the barbecue. I had yams and a green salad as a side and experimented with some gooey and moist chocolate brownies for dessert which I'll save for another post.

Adapted from: http://www.cookingandbeer.com

Serves 4

Ingredients

  • 1 1/2 lbs pork tenderloin
  • 1 cup apricot jam
  • 3 T Dijon mustard
  • 2 T soy sauce
  • 1/4 cup canola oil
  • 5 cloves garlic, minced
  • Fresh rosemary


Method

If using wooden skewers, soak them in water for at least an hour before using them.

Combine the jam, mustard, soy sauce, garlic and oil and mix well. Add the needles of four sprigs of rosemary in with the marinade. Cut the pork tenderloin into one inch pieces. Add them to the marinade, coating them well and refrigerate for an hour or overnight.

Preheat the barbecue to medium-high heat. Barbecue the pork skewers for about 15 minutes, rotating them every 3 minutes. Remove them from the heat and serve immediately.


Saturday, May 9, 2015

Chimichurri


Cooking is never simpler when living ingredients are in season. Right about now, I start getting excited for those first sitings of Taber corn and peaches from the Okanagan. Fantasies of backyard meals aren't far behind following a morning perusing the local outdoor market.

Don't think I would appreciate summer as much without our long, often bleak winters.

Anyhow, I roasted a few red peppers last night and while delicious on their own, decided I'd make a sauce to enhance their sweet and smoky flavour: chimichurri.


This one's easy. If you've got a blender or food processor, you're laughing. If not, you'll be mincing for awhile. I'm on a sauce kick this month. Last week I whipped up a batch of marinara sauce and used it on roasted eggplants with melted havarti. The leftover sauce went on steamed snapper. Delicious. Now, chimichurri doesn't have to have kick, but mine does. I tend to be a little over zealous with the heat. This recipe has a manageable amount, so don't be concerned.

Adapted from: http://www.epicurious.com/

Makes 1.5 cups

Ingredients

  • 1/2 cup oil
  • 2 cups flat leaf parsley, chopped
  • 1/4 cup cilantro, chopped
  • 3 T red wine vinegar
  • 1 red chili, chopped
  • 2 cloves garlic, chopped
  • salt and pepper to taste

Method

Place all ingredients into a blender or food processor and blend until smooth. Serve on meat, fish or vegetables.


Sunday, May 3, 2015

Liquor Cabinet One-Pot Chicken Bake


If you're wondering where the chicken is, it's under there in a booze-induced coma.


See! And because it's been soaking in liquor for 90 minutes, it falls apart like a Robert Hall suit.

I have renamed this gem, the Liquor Cabinet One-Pot Chicken Bake because as the chef, you may take liberties with your choice of alcohol. The chef I pilfered this recipe from opted for white wine, brandy and port. I went with red because I get to drink what I don't cook with and I prefer to drink red. I also don't have brandy on hand. I never have brandy on hand. Vermouth felt like a good trade off.

I went with skinless chicken thighs because they were available and frankly I could benefit from a little less fat. If you're interested in a richer flavour, then get yourself some good quality chicken meat and some with the skin on. I'm adding this to my 'Make Again' list.

From: http://www.supergoldenbakes.com/

Serves 4-5

Ingredients

  • 10 skinless chicken thighs 
  • 150 ml wine (I had red on hand)
  • 2 T dry vermouth 
  • 2 T port
  • 1 T white wine vinegar
  • 1 T dijon mustard
  • 100 g prosciutto, sliced in strips
  • 200 g cherry tomatoes, half
  • 2 cloves of garlic, whole
  • 5 shallots, peeled and sliced
  • 1 pepper (yellow, orange or red), thinly sliced
  • 1/4 cup of sun-dried tomatoes in oil, chopped
  • 1 T oil from the sun-dried tomatoes
  • coarse salt and ground pepper to taste
  • bunch parsley, chopped
  • 1 lemon, thinly sliced (use zest if preferred)

Method

Preheat the oven to 340F. Combine the wine, vinegar, port, vermouth and mustard and stir until blended. Place the chicken on the bottom of a large, lidded casserole dish. Add the prosciutto and all vegetables overtop. Season the surface with salt and pepper and add the sun-dried tomatoes. Cook covered for one hour. Remove the lid and cook another 30 minutes. Remove from the oven and top with parsley and lemon. Serve over pasta or rice.

Saturday, April 25, 2015

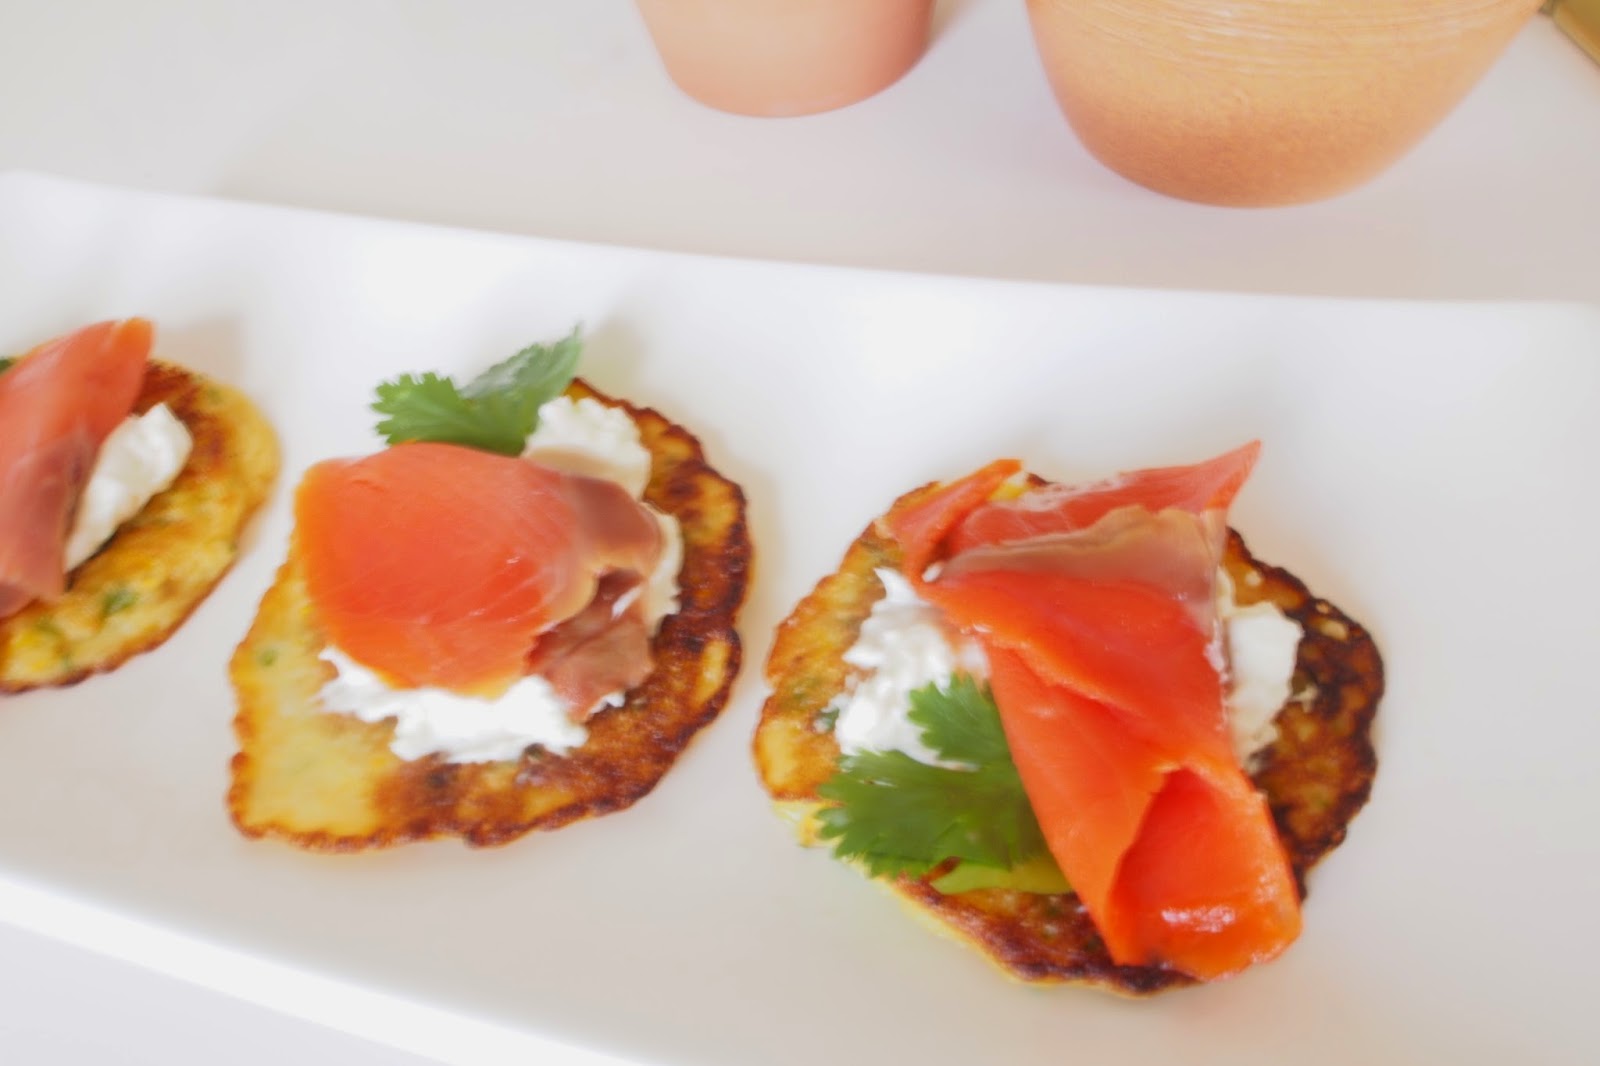
Corn & Chile Pepper Pancakes with Smoked Salmon & Horseradish Cream


Who packs canapés for their lunch when working at an industrial site? I do! Yes, this is totally over the top, but I wasn't hosting any cotillions this week, so I made these smoked salmon canapés which I packed for my lunches. I ate them in my office with the door closed so I wouldn't be judged. That said, they were spectacular little treats and when I was caught by a colleague stuffing one in my mouth he said, "That looks delicious." He was correct. 


One can adapt this recipe to cut out all cooking by replacing the savoury pancakes with pieces of rye or pumpernickel bread. Your 30-40 minute prep time will become 10-15. While you miss out on the great flavour of the pancakes, the salmon and horseradish cream combination are a treat in and of themselves.


Thanks to my mom who gave me it's source: High Plains: The Joy of Alberta Cuisine. The original recipe suggests smoked trout, but I wasn't able to find any. I'm going to have to dig a little deeper into this cookbook. It's got other locally inspired menu items that caught my eye.  


From:  Cavich, Cinda. "Corn and Chile Pepper Pancakes with Smoked Trout and Horseradish Cream" High Plains: The joy of Alberta Cuisine.  Calgary: Fifth House Ltd. A Fitzhenry & Whiteside Company. 2008. 7


Serves 8 as a starter


Ingredients


  • 180 g cold, smoked salmon, thinly sliced
Pancakes

  • 3 cobs of corn or 2 cups frozen corn, thawed and cooked
  • 2 fresh jalapeños, chopped
  • 1 chipotle chile in adobo sauce, chopped
  • 2 cloves garlic, minced
  • 1 red or yellow pepper, chopped
  • 6 green onions, chopped
  • 2 eggs
  • 1 cup flour
  • 1/2 cup cornmeal
  • 1 t baking powder
  • 1 t salt
  • 1 cup milk
  • 1/4 plain low-fat yoghurt
  • 3 T chopped, fresh cilantro
  • freshly ground black pepper
  • 2 T canola oil

Horseradish Cream

  • 1/3 cup spreadable cream cheese
  • 1 t prepared horseradish
  • 1 t wasabi paste/powder
  • freshly ground black pepper
  • 1 green onion, minced

Method

If using fresh corn, bring a large pot of water to a boil and add the corn. Boil for five minutes then remove the corn from the pot and set aside. Once cooled, slice the corn kernels from the cob.


In a bowl, combine the corn kernels, jalapeños, chipotle, red/yellow pepper, garlic and green onions. 


In a food processor, combine the eggs, flour, cornmeal, baking powder, salt, milk and yoghurt and blend until smooth. Stir in the cilantro and black pepper. Let stand for 20 minutes.


Heat the oil in a frying pan over medium heat. Pour in batter to make pancakes 1-2 inches in diameter for cocktails or larger if you want them as a side dish. Cook for about 1-2 minutes on either side. Drain the pancakes of any residual oil on a plate layered with paper towel. 


To serve, place a dollop of horseradish cream on each pancake. Separate the slices of salmon and cut each in half. Roll each piece into a coronet and place on top of the cream. Sprinkle with any remaining onions and/or cilantro.

Sunday, April 12, 2015

Chickpea Veggie Bowl


My work colleagues have a step challenge underway and it's breeding all sorts of other good behaviours, one of which is healthier eating habits. Frozen meals are being traded in for salads and home cooking is back in style. Hallelujah!

I tweaked my own diet earlier this year and a few key changes have stuck.  I cut out sweets after most meals and with the exception of holidays and a few weak moments, haven't deviated from this plan. I now crave sweets less and find that my tolerance for all things sugared has changed.  Desserts I used to love seem too sweet for me now.  I also cut back my alcohol intake, which has fattened up my bank account and trimmed my waist line.


This recipe celebrates the progress I and my colleagues have made to eat well in order to live better. Build on it or modify as required. I topped my veggie bowl with a spoonful of olive tapenade to give it a little extra dimension. Chili sauce (sambal oelek), a dollop of sour cream or humus would be nice with it as well.  Pair it with rice or noodles if you want more substance and of course, add some chorizo or chopped ham to it if meat isn't optional for you.

Adapted from: http://eathealthyeathappy.com

Serves 4

Ingredients
  • 1 1/2 cups cooked chick peas
  • 2 T olive oil
  • 3 garlic cloves, minced
  • 1 small onion, chopped
  • 1 red bell pepper, chopped
  • 1 medium zucchini, sliced
  • 1 bunch of asparagus, chopped
  • 3 cups sliced mushrooms
  • 1/2 cup of fresh basil, chopped
  • juice of half a lemon
  • salt and pepper to taste
Method

Heat the olive oil in a saucepan on medium heat. Saute the garlic for about half a minute, then add the onion, allowing it to cook for two minutes. Toss in the pepper, zucchini and asparagus and stir well to coat the vegetables with the oil. Let the vegetables sit for about two minutes. Add the mushrooms and cover the saucepan with a lid, keeping in the heat for another three minutes. Add the chickpeas, the basil and lemon juice and toss until they are combined well with the other ingredients. Season with salt and pepper to your taste. Serve with a spoonful of chili sauce or olive tapenade on top.


Monday, March 30, 2015

Seafood & Sweet Potato Pie


This would be one of the few adventures I've had that involves taking a recipe and turning it into my own creation. Chicken pot pie and shepherd's pie are at the top of my comfort food list so it was safe to assume a seafood pie would give me the warm and fuzzies too. What I didn't want was a lot of fat and little food value, so I upped the vegetable count and replaced some of the butter with yoghurt. In some cases I simply reduced the amount of butter overall. I'm pleased with the results, although I found my first attempt at it was a bit labour intensive.

There are four steps to this casserole: the sauce, the shrimp and veggie mix, the fish and the potatoes. Many pots were dirtied in this experiment, but that's where your dishwasher makes an appearance. Use it, readers. Use it.

It took me about an hour to assemble the pie, plus the baking time, so an hour-and-a-half from start to finish. In the big scheme of things, this isn't a long time, but if you've got hungry families to feed, it might be too long for you. I also find myself multitasking while cooking, so that hour included a load of laundry among other things. Anyways, it was worth it. Creamy comfort food, without any heaviness or guilt and loads of leftovers, which I can handle better than in previous months.


Adapted from: http://www.shrinkingsingle.com/

Serves 8-10

Ingredients 

  • 350g white fish
  • prawns thawed and tails removed
  • 1/2 cup frozen peas, thawed
  • 1 clove minced garlic
  • 1 Anaheim pepper, chopped
  • 1 onion; 1/2 diced and half cut into quarters
  • 1 cup spinach leaves
  • 1 large yam/sweet potato, peeled and chopped
  • 1 large russet potato, peeled and chopped
  • 2 T chopped cilantro or parsley
  • 1 T olive oil
  • 1 T unsalted butter
  • 2 T low fat yoghurt
  • 1 litre of low fat milk
  • juice of half a lemon
  • 3 T butter
  • 3 T flour
  • 10 peppercorns
  • 2 bay leaves
  • 1/2 cup shredded white cheddar
  • salt and pepper throughout

Method

Preheat oven to 350F. Grease a 9"X13" baking pan and set aside. Bring a large pot of water to a boil and add the yams and potato. Boil for ten minutes or until soft when poked with a fork. Drain the potatoes and add the unsalted butter and yoghurt. Blend with a hand held blender or potato ricer. Combine two tablespoons of the chopped parsley/cilantro and salt to taste into the mash and set aside.

In a frying pan heat the oil and add the pepper and diced onion, sautéing for one minute. Add the shrimp and stir until they lose their translucency; about 3 minutes. Add the peas and spinach and toss until the spinach begins to wilt. Season with salt and pepper and set aside.

In a saucepan combine the milk, peppercorns, quartered onion, lemon juice and bay leaves and bring
to a boil. Reduce to simmer and add the fish, allowing to simmer for 10 minutes. Remove the fish from the milk and set aside to cool. Once cooled, remove all the bones, pat dry and flake the fish.

In another saucepan, heat the 2 tablespoons of butter on medium heat and add the flour, stirring until combined. Pour the milk through a sieve into the saucepan to drain it of any remaining fish, bay leaves and peppercorns. Bring the sauce to a boil and then reduce to simmer until the sauce has thickened. Remove from heat.

Using the baking pan, begin by layering the bottom of the pan with the shrimp and vegetable mix. Add half of the sauce, follow with the fish and then with the remaining sauce. Top with the blended potato and cheddar cheese and bake the casserole in the oven, uncovered for about 20-30 minutes or until the top is browned.


Saturday, March 28, 2015

Oh-So-Wholesome Muesli


Why make muesli? For starters, muesli is just about the easiest kind of food prep there is so you'll be patting yourself on the back for weeks to come over having fed yourself wholesomely.  Second, making bulk batches will save you money over the store bought varieties. And finally, it gives you the freedom and control to choose your ingredients. If you've got nut allergies for example, or other food sensitivities, this is a must. 

Consider the recipe below as your baseline and expand your ingredients list from there. I eventually added dried cherries and hazelnuts to this batch because I found them loitering in the pantry. I top my muesli with chopped or grated apples and bananas as a way of getting fruit into my diet. Fruit typically isn't of interest to me unless it's battered and fried, paired with cheese or coated in chocolate. I have however, found other, less obnoxious ways to enjoy fruit and muesli is one example.

Adapted from: http://www.gatheranddine.com

Serves 4-6

Ingredients

  • 1 cup rolled oats 
  • 1/2 cup barley flakes
  • 1/2 cup rye flakes
  • 1/4 cup raisins
  • 1/4 cup sliced almonds (I used whole)
  • 2 T sunflower seeds
  • 2 T pumpkin seeds

For Serving

  • 2-3 cups of yoghurt (1/2 cup per serving)
  • fresh fruit of choice
  • honey or jam to top

Method

Combine dry ingredients and store in an airtight container. To prepare, combine the yoghurt and muesli in a bowl and mix well to ensure the yoghurt coats all of the muesli. Cover and refrigerate overnight. Serve the following morning with fruit. and top with either jam or honey as desired.


Saturday, March 14, 2015

Jamón Ibérico aka Iberian Ham


When Ruedi and I visited Spain last summer, we were introduced to jamón ibérico or Iberian ham, a Spanish and Portuguese delicacy that is a popular favorite among anyone who digs a good cut of meat. Both Ruedi and I had been to Spain in our single days and hadn't come across it, but we had much leaner travel budgets at the time. As far as I'm aware, acorn-fed jamón ibérico is as good as it gets in the Spanish ham community. Once weened, piglets are fed a diet of maize and barley and then released into fields where they graze on grass, acorns, roots and other available vegetation. Pigs that only feed on olives and acorns have a richer meat and become the chosen few. The pork is salted and air-dried for anywhere from twelve to forty-eight months before various parts are sold. A leg of jamón can retail from anywhere between one-hundred to one-thousand euros a pop. Bite on that meaty investment!


Ruedi's now living in Barcelona temporarily and his relocation presented an opportunity of sorts. Not one to pass up good eats, he was directed to El Charro a jamón retailer where he purchased the leg he's so proudly displayed to me on my arrival. He and his roommate and friend will be eating this for eons. 


Of course, one needs a carving stand and knife for their ham. Enter El Corte Inglés with a wide array of equipment selections that range in quality and price, depending on your requirements. 

When we've had it at restaurants it's been thinly sliced and served neat. Jamón ibérico has so many earthy, nutty dimensions, there isn't a need for any other ingredients, although wine is a fantastic idea!

La Tienda offers Spanish eats to North Americans, including Canadians! Yeah! Man, I get bummed when sites like these ship everywhere but my homeland. Of course, you pay a premium for an import like this, but I may succumb to the temptation in a year's time after a long jamón hiatus.

Post Script (March 15th) : Just found Lola & Miguel, an online retailer selling Spanish delicacies to Canadians. Bliss.

Monday, February 16, 2015

Salted Caramel Pots de Creme


I had a lovely little Valentine's Day meal with a few lady friends this past weekend and was reminded of how lucky I am to have great lady friends. What does one pair with great lady friends? Dessert, of course.  That's after a lot of good wine and two or three other courses. Consider these pots de creme your new creme caramels, ladies. I can't chat them up enough. They have a hint of milk chocolate that enhances the richness of the caramel and the addition of good sea salt adds an interesting dimension to an old favorite.

I made these a night in advance to ensure I got results I could use. My prep time was about 40 minutes, but I suspect I'd be able to trim that down a bit now that I've made it once. I like the idea that I can make it in advance, since that gives me time to do other food prep on the day of. For me and likely many others, forty minutes of preparation for a dessert seems like an investment, but these are so, so worth it. Dig in!


From: http://www.foodnetwork.com

Serves 6

Ingredients

  • 2 cups whipping cream
  • 1/2 cup whole milk
  • 1/2 t vanilla extract
  • 1/2 t sea salt 
  • 1 cup sugar
  • 1/4 cup of water
  • 30 g milk chocolate
  • 6 egg yolks


Method

Preheat the oven to 325 F. In a small saucepan combine the cream, milk, vanilla and salt and heat until the mixture begins to bubble. Set aside and cover to keep warm.

To make the caramel, combine the sugar and water in another saucepan and stir under medium heat until the sugar dissolves. Let the sugar water simmer for about 12 minutes until it turns a light amber color. Add the caramel to the cream mixture, stirring until combined. Finally, add the chocolate and stir until melted into the sauce.

Whisk the egg yolks in a bowl and then add half of the cream mixture, stirring until blended. Follow with the remaining cream mixture and then transfer the ingredients into a pitcher.

Do those servings look evenly divided to you?
Divide the mix evenly among six ramekins and place the ramekins in a baking dish filled with water that reaches halfway up each of the ramekins.  Bake, covered with tin foil for 45-50 mins, or until the mixture settles. Refrigerate for 2 hours or overnight.

I opted to broil the pots au creme on high heat with a little dusting of sugar before the items were served, to brown the surface a little; about 5 minutes. Once cooled, sprinkle the pots with a little sea salt.


Monday, February 9, 2015

Honey-Balsamic Roasted Strawberry Parfait


My smoothies, while delightful, look like dirty snow blended with compost, thanks to less-than-perfect blending technology. I have a decent blender, but it doesn't pulverize my ingredients like our nation's most coveted blender, the Vitamix Pro Series 300 (one day....one day).  I end up with bits of green and seeds floating in a purple-grey fog. I drink these little numbers at the office almost daily, but get odd looks and a number of questions from passers by. I also get all sorts of stuff in my teeth.

This weekend, as I was perusing through my favorite recipe resource, Tastespotting, I found a delightful looking snack that became a contender as an alternative to my compost smoothy. I put these into jars so they were portable and had one today following my cardio-intensive, morning email review. Two words: Deeee-lish.  Wait..just one: Yum.

From: http://www.2teaspoons.com

Serves 2

Ingredients
  • 1 lb fresh strawberries, sliced
  • 2 T honey
  • 2 T balsamic vinegar
  • 2 cups plain, Greek yoghurt
  • handful of oats and/or chopped nuts to top

Method

Preheat oven to 350 F. Toss the strawberries in honey and balsamic vinegar and pour onto a baking sheet. Roast for 25 minutes, remove from the oven and allow the strawberries to cool completely. Layer bowls or jars with a few dollops of yoghurt, then the strawberries and repeat with both ingredients. Top each serving with chopped nuts, oats or a combination of your choosing.