Showing posts with label dessert. Show all posts

Monday, April 24, 2017

Chocolate Dulce De Leche Thumbprint Cookies

Oh the weather outside is frightful...again. This shouldn't come as a shock to anyone living in Alberta. April and May are bound to have some less than predictable weather. The unpredictability of it is almost predictable. I am working in Northern Alberta under a fly-in, fly-out arrangement and my flight home Thursday evening was grounded for three hours courtesy of a juicy snow storm. Finally Edmonton got hit with the same snow two days later. It'll melt quickly and then reappear sometime in May usually for one last hurrah.

So instead of grumbling about it, I pulled out the wool socks, jogging pants and went to work in the kitchen making strawberry preserves, a few hot meals, salads and these delicious cookies. They are rich, moist and chewy. The kind of 3pm treat you look for with an espresso or other strong brew. I gave a bunch of mine away for fear that I'd have a a moment of weakness and eat them all. Good move on my part as they happen to be great for sharing.


From: https://www.donnahay.com.au

Makes 24 cookies

Ingredients

  • 1/2 cup of unsalted butter, softened
  • 1/2 cup berry or caster sugar
  • 1 t vanilla extract
  • 1 egg  yolk
  • 100g dark chocolate melted and cooled slightly
  • 1 cup all purpose flour, sifted
  • 1/4 cup Dutch cocoa powder, sifted
  • 3/4 cup dulce de leche


Method

Preheat the oven to 325F. Put the butter and sugar in a standing mixer blend until creamy; about 2 minutes. Add the vanilla, egg yolk and chocolate and process until combined. Finally, add the flour and cocoa and process until the mixture forms a ball. Place the mixture in a bowl or remove the base of the mixer if possible, cover with plastic wrap and refrigerate for 30 minutes. Roll a tablespoon each of the mixture into balls and place on two lined baking sheets. Indent the centre of each cookie by pressing your thumb into each one. Bake for 12-14 minutes and allow to cool a little on the sheets before transferring them to a rack. Spoon a dollop of the dulce de leche onto each cookie.

Sunday, February 26, 2017

Spiced Pear Upside-Down Cake


Happy New Year! Happy Chinese New Year! Wait, let's try this on for size: happy first quarter of 2017! I know I'm a little late to the party, but I hope your healthy resolutions have been set aside. If not, you are about to break them and make a cake that'll knock your socks off. Yes, you!

I took a little hiatus in January and February and walked the Camino de Santiago, a pilgrimage in Northern Spain. Foodies delight in the variety of treats one can find along the way. Unfortunately, most cafes and restaurants are closed in January because who in their right mind would walk across Northern Spain in the winter?! In fact, entire towns are closed for the most part, which makes one feel like the lone survivor in a zombie apocalypse. As the only survivor, I indulged in tuna with bread, chorizo with bread and cheese with bread. My delightfully beige diet was handy under the circumstances, but somewhat uninspiring.

I wasn't hard done by. I did, however get a little tired of the food updates from my partner-in-crime who was in St. Anton and Barcelona enjoying their four-star food scenes. Sometimes it's just best not to share all of your good news. I played catch up at the end of my trip and enjoyed some Spanish delicacies from the North and a few Catalan favorites in Barcelona. What struck me most were the fantastic pho, sushi and contemporary dishes I also found. The non-Spanish food was pretty remarkable.

This is my first post for 2017 and I was sure I'd be inspired by Spain's Northern cuisine to want to write about it. Instead, I'm just inspired to eat well and write about it. That's what I'm going to do.

I saw a picture of this cake on Pinterest and couldn't quite absorb it at first. The original recipe calls for pomegranate molasses, which gives the batter almost a dark chocolate color. The golden pears pop amidst that background and the combination along with great photography wooed me.  I didn't have pomegranate molasses, but used honey with a few squeezes of lemon instead to give the cake the sweet and tart combination that the molasses offers. I also didn't have walnuts readily available, so swapped walnuts in the batter for almonds. I would make this again. The pears are fantastic, especially when balanced with the almond and citrus in the cake. Of course it's also vehicle for whipped cream, which is pretty much the only reason I make cake in the first place.

As with most social media pics, the original was a work of art. Mine, was less arty and a little more avant-garde:


Notice that one pear has been ostracized from the rest. Maybe they had an argument in the oven; we'll never know. Anyways, this is what my baking looks like: it's not going to win any awards, but oh my, it is tasty.

Adapted from: http://www.bonappetit.com

Ingredients
  • 2 1/2 T unsalted butter, plus more for the pan
  • 1 1/2 cups all purpose flour, plus more for the pan
  • 3 T fresh orange juice
  • 1/4 cup runny honey
  • 1 t lemon juice
  • 1 3/4 cups sugar
  • 4 small, ripe Bosc pears (one of mine went missing-would rather not talk about it)
  • 1 cup, unsalted almonds
  • 1 1/2 t baking powder
  • 1/2 t baking soda
  • 1/2 t salt
  • 1/4 t ground cardamom
  • 4 large eggs
  • 1 t orange zest
  • 1 cup olive oil
Method

Preheat oven to 350F. Coat a 10 inch round cake pan with butter and cover the base with parchment paper. Coat the sides with a little flour.

Cook the 2 tablespoons of butter, orange and lemon juice, honey and a quarter cup of sugar in a frying pan on medium heat until the sugar has dissolved and the sauce has reduced. This should take about 4 minutes. Add the pears, cut side up and let cook for about 3 minutes, or until some of their juices are released. Flip the pears and cook face down for another 3 minutes. Let cool for a few minutes and then arrange the pears, cut side down on the bottom of the pan. Return pan to heat and allow the liquid to cook another 4-5 minutes, or until the mixture becomes syrupy. Pour mixture over the pears and keep in the freezer while you prepare the batter.

Blend the almonds and cup and-a-half of flour in a food processor until the nuts are finely ground. Pulse in the baking powder, baking soda, salt and cardamon.

Using an electric mixer on medium speed, combine the orange zest, eggs and remaining sugar until smooth; about 4 minutes. Add the dry ingredients in two batches, ensuring each batch is well blended before adding the next. Follow with the oil, adding it gradually until blended. Pour the batter over the pears and place pan on a foil-covered baking sheet. Bake for 50-60 minutes or until a toothpick comes out clean once inserted into the cake.


Sunday, August 28, 2016

Strawberry Rhubarb Galette


Periodically I revive the mid-afternoon coffee and cake habit that Ruedi and I picked up while on vacation. We call it cafe en kuchen, because it started in Germany, but carried on into other trips and at home. As much as I like to take credit for these notions, this isn't anything new. Nothing caps off an afternoon of wandering with a latte and sweet treat. I know this because cafes are full of wanderers like us waiting to dive into a tart or other delicacy along with their mid-afternoon coffee. When at home, I occasionally bake something we can dive into at 3pm (International cafe and kuchen time; 3:30 in Newfoundland). It feels decadent and my senses dip back into vacation mode as a result.
This weekend I experimented with a gingerbread and galette recipe and while both were successful, I only managed to get pictures of one of the results.

Thanks to one of my coworkers, I've been given access to an unending amount of rhubarb this summer. I made two galettes; he gets one of them. I'd suggest making two at all times. The galettes wind up being smaller than one anticipates and only serves four. If you want a second piece and have guests, you are out of luck!

Adapted From: http://the-salty-tomato.com

Serves 4

Ingredients
  • 1 cup rhubarb, chopped in 1/4" pieces
  • 1 cup strawberries, sliced
  • juice and zest of half a lemon
  • 1/4 cup granulated sugar
  • 2 t corn starch
  • 1, 9" frozen pie dough, thawed
  • 1 T milk
  • handful of brown sugar
Method

Preheat oven to 350F. In a large bowl, combine the corn starch and lemon juice in a bowl until all the starch is dissolved. Add the rhubarb, strawberries, lemon zest and granulated sugar, stirring well.

Roll the pie dough out and place in a 9" baking dish. Pour all of the fruit mixture into the centre of the dough and fold the edges of the the dough over onto the fruit, leaving the centre exposed. Brush the edges of the dough with milk and sprinkle the brown sugar over top. Bake for 35 minutes or until the crust is golden.  Serve with enormous dollops of whipped cream.


Sunday, April 10, 2016

Red Ox Inn-Inspired Lime Posset with Coconut Chantilly Cream


My first fine dining experience when I moved to Edmonton almost ten years ago was at the Red Ox Inn. My parents were in town for a visit and my mom, the original foodie in the family, had been recommended the little ten table affair. I hadn't had any exposure to contemporary food in the city and was keen to dive in. That first meal was a goodie. Good enough to have me return a number of times in a few short years.  Eventually I got swept away by the burgeoning food scene invading Edmonton and nearly forgot about it. Nearly. One always finds their way back to the scene of the crime and I managed to do just that.

Ruedi and I had an early meal there a few weeks ago and realized we had waited too long. Ruedi indulged in a pork belly appetizer with a parsnip puree, while I ate a modern caesar salad with garlic aioli and brioche croutons. As beef lovers, we both chose sirloin as our main, but were provided a deliciously prepared rib eye instead, cooked medium at the recommendation of the chef, which ensured the marbling didn't render the meat too chewy. But the celebrity of the evening was a delicate lime posset which we shared, served with a coconut chantilly cream and a dusting of pistachios.

Posset is an egg-free custard and likely the easiest dessert you will ever make. It's light, generally perfect and was paired at Red Ox with what I believe was a coconut flavored (extract? ground? milk?) whipping cream. I tried making my own version at home and was mighty pleased with the results. This is a nice, light treat following any meal, particularly a heavy dish.

Serves 4

Adapted from:http://www.epicurious.com

Ingredients

Posset

  • 500 ml whipping cream
  • 50 ml fresh lime juice (keep the skin for zest)
  • 2/3 cup berry sugar

Coconut Chantilly Cream 

  • 250 ml whipping cream
  • 2 T icing sugar (approximate-add by the teaspoon to suit your tastes)
  • 2 T coconut milk (the thick white goop at the top of the tin)
  • Pistachios
  • Lime zest

Method

To make the posset, heat the whipping cream on medium heat and add the sugar, whisking until dissolved. Bring to a boil and then simmer for three minutes. Remove the mixture from the heat and add the lime juice, stirring vigorously. Transfer the cream mixture into about 4 individual serving dishes. Refrigerate for 3 hours or overnight.

In a bowl combine the 250ml of whipping cream, coconut milk and icing sugar.  With an electric beater or standing mixer, whip the cream until it forms stiff peaks. Spoon heapfuls of the cream on top of the posset dishes and top with a few pistachios and lime zest.


Sunday, November 29, 2015

Apple Bruschetta with Pumpkin Butter


I like this dish. As an appetizer, it satisfies your sweet tooth. As a dessert, it's a refreshing change from very sweet recipes we are used to and would go well with a little port. You can also swap out the caramel sauce with goat cheese, as an example, to inject a little savoury in with the sweet.  If you're wondering what to do with the leftover pumpkin butter, milkshakes and ice cream sundaes come to mind, but there are a number of other great ideas here:  http://www.foodandwine.com


Pumpkin butter

  • 2 cups pureed pumpkin
  • 2 T apple juice
  • 1/2 cup brown sugar
  • 1/2 T ground cinnamon
  • 1/4 T ground nutmeg
  • 1/2 t vanilla
  • 2 T maple syrup
  • dash of salt

Apple Bruschetta

  • 1 baguette, sliced
  • 3 granny smith apples
  • 1/2 t cinnamon
  • 1/8 t nutmeg
  • 1/4 cup brown sugar
  • 1/2 T butter
  • 1/2 cup caramel sauce 

Pumpkin Butter

Combine all ingredients in your blender. If you have a Vitamix, run the ingredients through the smoothie setting once, then with a spoon, stir the ingredients and run it through the smoothie setting again. If you're working with a traditional blender, blend for 30 seconds on low speed, another 30 seconds on medium and 30 seconds on high speed for two rounds. Pour the blended ingredients into a pot and bring to a low boil. Reduce heat to low and let simmer for ten minutes with the lid ajar. Remove from heat and let cool.

Apple Bruschetta

Preheat oven to 350F. Place the baguette slices on a baking sheet and bake for 10 minutes. Remove from oven and set aside.

Peel, core and dice the apples. In a bowl, combine the apples with the cinnamon, nutmeg and sugar, ensuring the apples are well coated with the other ingredients. In a small pot, melt the butter and add the apple mixture. Sauté the apples for about 6 minutes, stirring occasionally. The apples should be cooked, but not mushy.

Spread a thin layer of the pumpkin butter on the baguette slices. Add a spoonful of the apples on top and drizzle with caramel. 


Saturday, November 28, 2015

Chocolate Cupcakes with Peppermint Frosting


Baking shmaking!! I can put together a basic cake and a few squares, but delicate pastries and other French concoctions take patience, practice and timing. Meh. The cupcake, however, can be pulled off by a more careless and aloof baker. If the cake winds up tasting like sandbox, you can always load on a lethal amount of icing as a cover up.

My stand mixer gathered dust for about 10 months this year. A few weeks ago, I finally pulled it out to try my hand at some Christmas baking and have had some good results so far. This recipe is one of those results and I encourage you to try it out. If peppermint isn't your thing, I made a similar batch of cupcakes with two teaspoons of Bailey's Irish Cream creamer and a teaspoon of espresso (prepared with water, that is) and some instant espresso grounds sprinkled on top.  I found the icing a little wet, which didn't give me the decorative look I was hoping for. If you want a better looking topping for your cupcakes, you'll need to add more icing sugar to get that result.

From: http://www.myrecipes.com/

Makes 12 cupcakes

Cupcakes

  • 1 cup brown sugar
  • 6 T unsalted butter, softened
  • 2 large eggs
  • 1 1/4 cups all purpose flour
  • 1/2 cup cocoa
  • 1 t baking powder
  • 1/2 t baking soda
  • 1/2 t salt
  • 1/2 cup buttermilk
  • 1 t vanilla extract

Peppermint Icing

  • 2 cups powdered sugar
  • 1/2 cup light tub-style cream cheese
  • 1/8 t peppermint extract
  • 12 hard peppermint candies, crushed


*I had to double the icing recipe to get enough icing to pipe on to the cupcakes. If you opt to spread the icing on with a knife, you won't need to double your quantities.

Method

Preheat oven to 350F. Place brown sugar and butter in a stand mixer and mix until smooth. Add eggs, one at a time until combined. Combine the dry ingredients in a bowl. Add the dry ingredients in stages to the mixer, alternating with the buttermilk. Once all combined, pour the batter into individually lined cupcake tins. Bake for 12 minutes. To test, poke the centre of a cupcake with a toothpick. If done, the toothpick should be clean.

For the icing, blend all ingredients together. Spoon the icing into a plastic bag and cut the tip off of one corner of it. Squeeze the icing onto each cupcake.

Tuesday, July 14, 2015

Rhubarb Ice Cream


I'm having second thoughts about not putting "no ice cream maker required" in the title, but it seemed like a lot of information for a title. This was on the June cover of Chatelaine magazine and the link to their site for further ice cream flavours is below. Next round will be the salted caramel.

The recipe only calls for cream, sweetened condensed milk and a vanilla bean as the base. Place these in a standing mixer for four minutes and then freeze it for at least six hours. If you want a flavour other than vanilla, Chatelaine provides some interesting options to choose from. What I found with my first batch was a mixture with a lot of ice crystals in it. The result tasted more icy than creamy. Apparently the faster you can freeze the product, the fewer ice crystals will form in it. With the next batch I mixed the ingredients together, put everything in the freezer for five minutes, including the mixing bowl and then mixed it for the allotted time. Once the recipe was transferred back into a storage container, I placed it in the freezer and mixed it periodically with a whisk as it froze. The result was more in line with the texture I am familiar with.

Rhubarb offers a fresh take on this little number. The stuff grows like a weed in this province and I find people are more than happy to get rid of it. The tart and sweet combo's a winner for me.

Adapted from: http://www.chatelaine.com

Serves 2-3

Ingredients

  • 2 cups finely chopped rhubarb
  • 1 cup 33% cream
  • 150 ml of sweetened condensed milk


Method

Place a pot on medium heat to warm it. Add the rhubarb, mixing it well to let the water evaporate from it. Increase the heat to a medium-high temperature and keep stirring for about 3 minutes or until the rhubarb is mushy. Set aside and let cool to room temperature.

Place the cream and condensed milk in the bowl of a standing mixer. Place the bowl and contents in the freezer for 5 minutes. Once chilled, mix the ingredients for about 4 minutes. Transfer the ice cream mix into a storage container and freeze for at least 6 hours before serving.

Monday, February 16, 2015

Salted Caramel Pots de Creme


I had a lovely little Valentine's Day meal with a few lady friends this past weekend and was reminded of how lucky I am to have great lady friends. What does one pair with great lady friends? Dessert, of course.  That's after a lot of good wine and two or three other courses. Consider these pots de creme your new creme caramels, ladies. I can't chat them up enough. They have a hint of milk chocolate that enhances the richness of the caramel and the addition of good sea salt adds an interesting dimension to an old favorite.

I made these a night in advance to ensure I got results I could use. My prep time was about 40 minutes, but I suspect I'd be able to trim that down a bit now that I've made it once. I like the idea that I can make it in advance, since that gives me time to do other food prep on the day of. For me and likely many others, forty minutes of preparation for a dessert seems like an investment, but these are so, so worth it. Dig in!


From: http://www.foodnetwork.com

Serves 6

Ingredients

  • 2 cups whipping cream
  • 1/2 cup whole milk
  • 1/2 t vanilla extract
  • 1/2 t sea salt 
  • 1 cup sugar
  • 1/4 cup of water
  • 30 g milk chocolate
  • 6 egg yolks


Method

Preheat the oven to 325 F. In a small saucepan combine the cream, milk, vanilla and salt and heat until the mixture begins to bubble. Set aside and cover to keep warm.

To make the caramel, combine the sugar and water in another saucepan and stir under medium heat until the sugar dissolves. Let the sugar water simmer for about 12 minutes until it turns a light amber color. Add the caramel to the cream mixture, stirring until combined. Finally, add the chocolate and stir until melted into the sauce.

Whisk the egg yolks in a bowl and then add half of the cream mixture, stirring until blended. Follow with the remaining cream mixture and then transfer the ingredients into a pitcher.

Do those servings look evenly divided to you?
Divide the mix evenly among six ramekins and place the ramekins in a baking dish filled with water that reaches halfway up each of the ramekins.  Bake, covered with tin foil for 45-50 mins, or until the mixture settles. Refrigerate for 2 hours or overnight.

I opted to broil the pots au creme on high heat with a little dusting of sugar before the items were served, to brown the surface a little; about 5 minutes. Once cooled, sprinkle the pots with a little sea salt.


Sunday, December 1, 2013

Pumpkin Cheesecake Trifles


There appears to be a pattern developing over my choice of desserts for this food blog. For one, I dig cream cheese and over the life of this Eat, Belch, Fart adventure, have been putting it into all variations of dessert. Second, I get a kick out of puddings and custards. I like their texture and simplicity and maybe the fact that I can fit it in a cup. Here is yet another pudding concoction that is worth a try. If you like sweetness in moderation, I would put in half to two thirds of the sugar into the pumpkin, cream cheese mix and add more to suit your taste. This a lazy man's pumpkin cheesecake, or depending on your perspective, a clever man's pumpkin cheesecake. 


Adapted from: http://kikicuisine.com/

Serves 4


Ingredients


  • 2/3 cup of graham wafer crumbs
  • 1 T, melted unsalted butter
  • 1 8oz brick of cream cheese, softened
  • 1 cup of canned pumpkin
  • 750 ml of whipped cream
  • 1/2 cup granulated sugar
  • 1 t vanilla
  • 1/2 t nutmeg
  • 1/4 ground cloves
  • 1/2 t ground cinnamon
  • 1/2 t ginger

Method

Combine the melted butter and graham wafer crumbs in a bowl. 

Whip the cream in another bowl until stiff peaks form. 

Using a standing mixer, blend the cream cheese until smooth. Add the pumpkin until well incorporated and follow with the vanilla and spices. When well blended, fold in half of the whipping cream.  

Assemble the dessert by adding a few spoonfuls of the graham wafer crumbs to the bottom of your serving cups or bowls. Next, add a few spoonfuls of the pumpkin mix and follow with a few dollops of whipped cream. Repeat and top with whipped cream.


Sunday, September 29, 2013

Plum Cakes and Chocolate Chip Cookies


Baking on a Sunday morning isn't for everyone, but the payoff is pretty sweet when you make the effort. My rewards include a kitchen that smells like goodies and a large inventory of baking. 

Now baking was just part of the day's cooking bonanza, but let's focus on one item at a time. First, the plum cakes. In an effort to sway those health nuts out there, I should refer to the cakes as muffins instead. They are lower in fat and nutritious enough that I'm in the process of making a second batch for the week's afternoon snacks. The butter amount is reduced thanks to the addition of avocado and they aren't loaded with sugar. My favourite touch is of course the plum wedges that top them. If plums aren't in season, top them with another pitted fruit. 


The cookies, on the other hand are my answer to an ongoing household debate: what constitutes a good cookie? Ruedi is a wholesome treat eater. His favourite cookies contain items like orange zest, ground almonds, seeds of some kind, squirrels' teeth, you know, nature's little gems.


My favourite cookies include of a lot of processed crap. Cream cheese, candies and artificial fillings really do it for me. I can't help it. I dig that shizzle. The recipe below is one my mom first introduced me to as a kid. It's just a basic chocolate chip cookie recipe, using milk chocolate chips and vanilla pudding. Even though Ruedi has his principles, I did spot him scarfing a few down between naps. What a trooper. 


Plum Cakes


From: http://dailyburn.com


Makes 12 cakes muffins 


Ingredients

  • 3/4 cup flour
  • 1/4 cup ground flax
  • 1 1/2 t baking powder
  • 1/4 t kosher salt
  • 3 T butter
  • 2 T avocado
  • 1 t lemon zest
  • 1/3 sugar
  • 1 egg
  • 1 t vanilla extract
  • 2/3 cup of low fat milk
  • 1T raw sugar (optional-I opted out)

Method

Preheat oven to 350F. Apply cooking spray to a 12-portion muffin tin. Set aside.

Whisk the flour, flax, baking powder and salt together in a bowl. In the bowl of your kitchen mixer, combine the butter and avocado, mixing until blended, about 3 minutes. Add the lemon zest and blend for another minute. Pour in the sugar and egg, continuing to mix until combined. Finally, add the milk and flour mixture in 3 phases with the wet ingredients.  Once well blended, spoon the batter evenly into the muffin tin. Bake for 20 minutes. Remove from oven and let sit for 5 minutes. Remove the muffins from the tin and let cool completely on a wire rack.


Chocolate Chip Cookies


Makes 3 dozen
  • 2 1/4 cups all purpose flour
  • 1 t baking powder
  • 1 cup butter (room temp)
  • 3/4 cup of golden sugar
  • 1/2 cup of granulated sugar
  • 1 package (100g) of instant vanilla pudding
  • 2 eggs
  • 1 t vanilla extract
  • 2 cups milk chocolate chips
  • 1 cup chopped walnuts (optional-I opted out)

Method

Preheat your oven to 350F. 

Sift the flour and baking powder into a bowl. In the bowl of your kitchen mixer, combine the butter and both sugars until smooth. Incorporate the pudding mix in with the wet ingredients until well blended. Add the eggs, vanilla until combined. Finally, fold in the chocolate and nuts using them, into the dough. Spoon 12 tablespoon-sized portions of the dough onto your cookie sheets. Bake for 10-12 minutes, or until golden brown. Remove from oven and let cool before storing.  


Monday, May 20, 2013

Weeknight Cooking Part 3 of 3: Screw dinner, we're moving straight to dessert!

Whippity do da!

Last weekend I tried a berry cheesecake that knocked my socks off. Trees Organic Cafe in Vancouver was serving it, Ruedi discovered it and I ate it. That's all you need to know. 


This is a cheater's version. Wish I could attempt to make the air-dried bison we ate too, but that's a little above me.


No-Bake Berry Cheesecake


Adapted from: http://www.howsweeteats.com


Serves 4


Ingredients


  • 4 glasses, mason jars or other individual serving dish
  • 2/3 cup graham cracker crumbs
  • 3 T melted unsalted butter
  • 1, 250g package of cream cheese
  • 1 cup frozen mixed berries, thawed
  • 2 T coconut milk
  • 2 T condensed milk
  • 2 t vanilla extract
  • fresh raspberries
  • fresh whipped cream as a topping

Method

Combine the melted butter with the graham wafer crumbs and using a spoon, tamp the crumb mixture into the bottom of each serving glass.

In a mixer, combine the cream cheese, berries, coconut and condensed milk until smooth. Scrape down the edges and add the vanilla. Spoon the mixture into each glass until evenly distributed. Top with raspberries, whipped cream and more raspberries. Eat and get gas from all that dairy.


Saturday, April 20, 2013

The Black Rice Diaries


Here's what you should know about black rice: its hull contains more vitamin E, a known immune system booster, than brown rice and it has more anthocyanin antioxidants than blueberries. Does it sound like I know what I'm talking about? Well I don't, but someone at Health.com does (http://www.health.com).

The health benefits of black rice had nothing to do with my decision to experiment with it this week. I liked the look of it and found a bag of Thai glutinous black rice at Superstore. Chinese black rice is another type worth looking into. In fact, the black rice bowl may be better served with this type of rice.

Black Rice Bowl

Adapted from: http://kidcultivation.blogspot.ca

Makes 6 servings


Ingredients


  • 1 1/2 cups black rice (recipe calls for Chinese black rice, but I used the Thai version)
  • 3 boneless, skinless chicken breasts
  • 3 T sunflower oil, plus 2 T for cooking the chicken breasts
  • 1/2 cup minced red onion
  • 2 serrano chili peppers, diced
  • 1 T fresh lime zest
  • 3 T fresh lime juice
  • 2 T rice vinegar
  • 1 T fish sauce
  • kosher salt
  • 1/2 cup fresh snap peas ( I didn't have them)
  • 2 small, ripe avocados
  • cilantro to garnish
  • sambal oelek to garnish

Method

Note: The original recipe prepares this dish as a salad. I chose to turn it into somewhat of a rice bowl. If you want to prepare and serve it as a cold salad, let the rice cool for an hour or so before mixing it in with the dressing and other ingredients. Note the original recipe did not include chicken.


Combine 2  and 3/4 cups of water and the rice into a large pot. Bring the water to a boil, reduce to simmer and cover, cooking for about 30 minutes or until the rice is tender. 


To prepare the chicken, heat the 2 tablespoons of the canola oil in a frying pan. Cut the breasts into bite size pieces and toss them in with the oil. Cook for approximately 10 minutes or until all the pieces are well browned. Set the chicken aside. 


In another pan, heat the remaining 3 tablespoons of oil and add the onion, cooking for about 1 minute and then the chili peppers. Cook until the onions become translucent.

In a large bowl, combine the lime zest, juice, vinegar, fish sauce and salt in a bowl. Stir well and set aside.

Pour the rice and chicken into the bowl with the dressing, tossing well until all the dressing has coated the rice.  To serve, spoon the rice mixture into individual bowls and top with slices of avocado, cilantro and sambal oelek or whatever chili sauce you have on hand if heat is your thing. 


Coconut Black Rice Pudding


Makes 6 servings


Ingredients
  • 2 1/2 cups water
  • 1 cup coconut milk
  • 1 cup black rice
  • 3 T brown sugar
  • 3 T shredded coconut
  • 1/2 t salt

Method

In a medium saucepan, bring the coconut milk and water to a boil. Reduce heat and simmer , uncovered for 45 minutes, or until the rice is tender.

Meanwhile, to toast the coconut, preheat the oven to 350F and spread the shredded coconut across a cookie sheet. Bake until golden brown, about 10 minutes. 

Once the rice is cooked, add the sugar and salt and simmer for a few more minutes until the rice reaches your desired texture. Taste and adjust the seasoning as required. Serve in individual bowls, topped with the coconut. I had a few almonds hanging around that looked like a good addition, so used them as a garnish as well.


Sunday, March 10, 2013

The Baking Wannabe


Burning Baking cookies on a Sunday morning was on today's agenda and while I was motivated to get it done, I have no interest in the general process. I don't know what it is about baking versus cooking, but it would appear that most kitchen enthusiasts have a preference. Mine is definitely cooking. This should be obvious considering my reputation as a somewhat careless cook. One just doesn't get away with that when baking. 

Take today's escapade for example. I burnt the bottoms of the first two dozen cookies I baked and overheated the chocolate I was to use for dipping another batch. Instead of dipping the cookies, I placed turd-like dollops of chocolate in the centre of each one. It's difficult to really inspire confidence in my baking when the outcome resembles poop.

Despite the visible shortcomings of my cookies, they taste great and I would bet that you could manage to not burn the bottoms and keep the chocolate dipable long enough to produce something that looks like a cookie. This is my Sunday challenge to you.


Turd Cookies (Formerly named Peanut Butter Brownie Gooey Butter Cookies)


Makes two dozen

Ingredients
  • 1/2 cup flour
  • 1/3 cup cocoa
  • 1 1/4 sugar
  • 1/4 t salt
  • 250 g of cream cheese
  • 1/2 unsalted butter
  • 1/3 cup peanut butter
  • 1 egg
  • 1 t vanilla extract

Method

Preheat oven to 350F.

In a bowl combine the flour, cocoa, sugar and salt and set aside. Using a standing mixer or similar device, cream the butter and cream cheese. Add the vanilla, peanut butter and egg and mix until all combined. Slowly mix in the flour, letting it blend with the batter before adding more.

Roll the dough into spoon size balls and place on an ungreased cookie sheet. Bake for approximately 10 minutes. 


Chocolate Dipped Potato Chip Cookies


Makes a dozen

Ingredients
  • 3/4 cup flour
  • 1/4 granulated sugar
  • 1/4 icing sugar
  • 1/2 cup ground potato chips
  • 1/4 t salt
  • 1 egg yolk
  • 1 t vanilla
  • 10 oz dark chocolate for dipping
  • coarse sea salt for garnish

Method

Preheat the oven to 350F and line a cookie sheet with parchment paper.

Combine the flour, potato chips and salt in a bowl. Cream both sugars with the butter using a mixer and beat in the egg yolk and vanilla. Slowly add the flour mixture to the dough. Spoon about a tablespoon's worth of dough for each cookie on the parchment-lined sheet. Bake for 10-12 minutes or until golden around the edges. Once the cookies have cooled, melt the chocolate on a double boiler and dip the cookies in the chocolate. As the chocolate is cooling, sprinkle the surface with a little sea salt. 


Sunday, December 23, 2012

Rosemary Lemon Shortbread Cookies


I believe the actual feedback from the subjects of this shortbread experiment went something like this:


Question: So, what's your first reaction?

Answer: This would be better without lemon and rosemary.

I get it. Your grandmother made shortbread, mince tarts and fudge...perhaps some ungodly marshmallow concoction too. Doesn't matter what she made, this is what you know and what you look for at Christmas.  I feel much the same way. Unfortunately, I'm also a sucker for unique flavour combinations and I think there's a place for recipes like rosemary lemon shortbread.  This particular one is zesty and delicious, especially with a mug of black tea. Just be sure to have the classic version handy too. You don't want your Christmas party to get ugly. 


From: http://www.sweetpeasandsaffron.com


Makes 3 dozen cookies


Ingredients


  • 1 cup unsalted butter
  • 2 cups of all purpose flour
  • 1/2 cup granulated sugar
  • 3 T lemon juice
  • 4 1/2 t minced, fresh rosemary
  • 1 t lemon peel
  • 1/2 t vanilla extract
  • 1/4 t salt


Method

Cream together the butter and sugar. Add the lemon juice, lemon peel and vanilla extract to the butter mix, stirring well. In a separate bowl combine the flour, rosemary and salt. Add the dry ingredients to the wet in batches. 

Chill the dough for two hours or overnight. When ready to bake, let the dough warm up and roll it into tablespoon-sized balls. With a spoon, press the balls into a parchment paper-lined cookie sheet, flattening them to 1/4 inch-width disks.

Bake at 350F for 10-12 minutes or until the edges are a golden brown.  


Monday, May 28, 2012

Vanilla Panna Cotta with Port-Balsamic Glazed Cherries


This is one of those recipes I neglected to read from top to bottom before preparing it hours before consumption. I tried one an hour after having made the panna cotta and it hadn't set. I guess they weren't kidding when they tell you to refrigerate overnight. Anywho, this bad boy up top is a day-old sampler and it was ready to be eaten. 

Puddings make the top of my list for all-time favorite desserts. They are also the poster boys for comfort food, so I'm sure there's a connection there. This monologue is making me hungry for rice pudding. Better check the cookbooks.

Adapted from: http://www.redshallotkitchen.com

Serves 6

Panna Cotta
  • 1 cup of milk 
  • 1 packet of unflavored gelatin
  • 2 cups whipping cream
  • 1/2 cup of sugar
  • 1 t vanilla extract
  • oil

Cherries
  • 1 lb frozen cherries
  • 3/4 cup of port
  • 1/2 cup of sugar
  • 2 T balsamic vinegar

Method

Brush six, 3/4 cups with the oil. If you are serving the panna cotta in the same dishes you are setting them in, skip this step. Pour milk into a medium bowl. Sprinkle the gelatin over the milk, letting it sit for five minutes until it softens.

Heat the whipping cream and sugar in a heavy saucepan, mixing until the sugar dissolves. Bring the cream to a boil. Remove from heat and add it to the milk mixture. Add the vanilla and mix well. Working in two batches, pour the mix in a blender and pulse three times for a few seconds each. Pour the mix into the cups, cover and refrigerate overnight or up to two days.

Stir cherries, sugar, vinegar and port in a saucepan over medium heat until the sugar dissolves. Bring to a boil, reduce to medium and let simmer until the sauce thickens enough to coat the back of a spoon. Remove from heat and let cool down to room temperature. 

Spoon the cherries and sauce onto the panna cotta and serve.


Sunday, May 27, 2012

This Week's Snack Stash


With the exception of my father's peanut butter and dill pickle sandwiches, our house was a nut free one while I was growing up. Both my sister and mother suffered from severe nut allergies, and avoided all contact and consumption of them. I didn't miss them. Seeds and other substitutes were used in dishes that called for nuts and my mother's love of great food made for great meals. As I learned to cook, my assimilation with the nut world grew gradually. Nuts were a cheaper protein and incredibly versatile. Today I throw them into virtually any type of dish. I can't help but wonder though, what would make a useful substitute when I am cooking with nuts. In the back of my head, I'm always attempting to adjust the recipe in the event I end up serving the dish to someone with allergies.


The next time I make these no-bake energy bites, I'll be using tahini instead of peanut butter. I can bet that the combination of honey with the crushed sesame seeds will make a terrific combination. I'll also be able to share these with my nut-sensitive hiking buddies, which I'm sure they'll get a kick out of. 

No-Bake Energy Bites

Adapted from: http://gimmesomeoven.com

Makes about 16 balls

Ingredients
  • 1 cup rolled oats
  • 2/3 cup shredded coconut
  • 1/2 cup peanut butter (I'm using the kind without sugar, so if you're thinking of using sweetened stuff...don't)
  • 1/2 cup chocolate chips
  • 1/2 cup of wheat germ or ground flax
  • 2 T honey
  • 1 t vanilla


Method

Combine all ingredients and mix well. Throw the mixture into the fridge for at least a half hour, giving the mixture time to bind. Once chilled, form the mixture into balls the size of your choosing and refrigerate until ready to eat. These snacks should keep for a week.

Sunday, April 22, 2012

Key Lime Pie

This particular key lime pie is more about mixing and less about baking. Although I've never made any dessert with lime, I enjoy everything lemon and thought this would be of a similar vein. It is. It also is easy and a terrific excuse to break out the whipping cream. Go on now, buy yourself some limes, butter, eggs and graham crackers and wow your buddies today. Don't forget the whipping cream. You'll need dollops of it to accompany the pie.


From: Canadian House & Home. May, 2012. p 158 

Ingredients
  • 1 cup graham crackers, crushed (or graham crumbs)
  • 1/2 cup butter, melted
  • 120 ml key lime juice, or regular lime juice
  • 5 egg yolks
  • 1 can sweetened, condensed milk
  • whipped cream for serving


Method

Preheat oven to 375 F. In a medium bowl, combine graham cracker crumbs and melted butter. Press firmly into pie plate. Combine sweetened, condensed mil and egg yolks, whisking together. Whisk in lime juice until smooth. Pour mixture into pie crust and back until set, about 20-25 minutes. Let cool, then refrigerate for at lest 3 hours. Garnish with freshly whipped cream and serve.

Sunday, February 26, 2012

Chai Tiramisu


Have I mentioned that I loved dinner parties? Now, if I could only meet more dinner party lovers, my life would be complete. This was the finale for a simple meal we held at the Eder-Laughren compound last week. Love that this dish needs to be made in advance, but I was also keen on this unusual twist to an old classic.  My sister-in-law made the original tiramisu over Christmas and it blew my mind. All that cream, liquor and indulgence in one no-bake dish. Devine.  With 65% of lactose intolerance among adults, I'd suggest you pound back your Lactaid before you dig in.

From:: http://www.foodnetwork.ca

Serves 12

Chai Spice Blend
  • 2 whole star anise
  • 1 cinnamon stick
  • 5 cardamom pods
  • 2 black peppercorns
Filling
  • 1 1/2 cups whipping cream
  • 2 cups mascarpone cheese
  • 1 T vanilla
  • 3/4 cup berry sugar
  • 2 T coffee liqueur
  • 2 t chai spice blend
Assembly
  • 1 cup sugar
  • 1 cup water
  • 1 t chai spice blend
  • 1 t vanilla
  • 2 packages of chocolate wafer cookies
  • 1/2 cup whipping cream
  • cocoa for dusting each serving

Method

For the spice blend: grind cinnamon stick in a spice grinder or with a mortar and pestle. Add remaining spices and grind into a powder.

For the filling: Whip cream into medium peaks. Add vanilla and chill until ready to use. Beat mascarpone with sugar until smooth. Stir in spice blend and coffee liqueur. Fold in whipped cream and chill until ready to assemble. 


For the assembly: Heat water, sugar and chai spice blend until sugar is dissolved. Stir in vanilla and remove from heat. Dip wafers in syrup and use them to line an 8" dish. Spoon a 1/4 of the filling over the wafers evenly and top with another layer of wafers and filling until all of the filling is used. I opted to top of the dish with the wafers, but the recipe suggests the filling. When ready to serve, top with whipping cream (I chose not to sweeten my cream) and a dusting of cocoa. 


Sunday, November 20, 2011

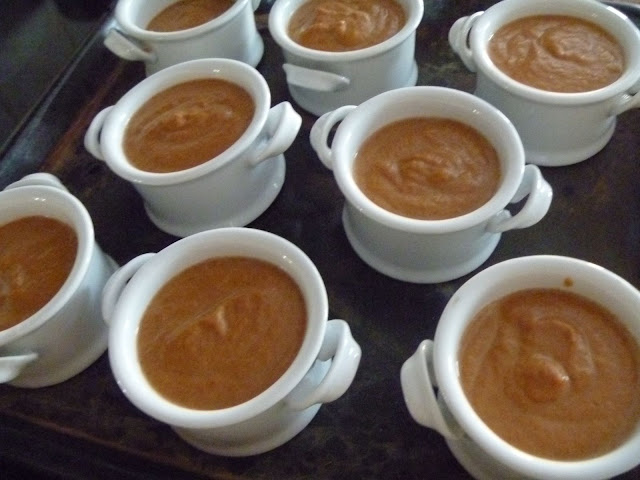
Baked Pumpkin & Sour Cream Pudding


I really am trying to deviate from Deb Perelman's food blog, but her photography and recipes beg to be made. This recipe is no exception. Between this post, and tonight's mix of lamb-stuffed eggplants, carrot soup and fennel salad I realize that I may need to pick a direction for future meals. This menu is all over the place. No regrets tonight though as far as I'm concerned. Somehow all of these flavours haven't detracted from each other.


Makes approximately 8, 1/2 cup servings

Pudding
1 3/4 cups pumpkin puree (unsweetened; not pumpkin pie filling)
1/2 cup  granulated sugar
1 t ground cinnamon
1/2 t table salt
1/2 t ground ginger
1/4 t ground cloves
1 cup whole milk
1/2 cup heavy cream
2 large eggs, lightly beaten


Topping
1 cup sour cream
1 tablespoon granulated sugar
1/4 teaspoon vanilla extract


Preheat oven to 350°F.
The quickest method: In a medium bowl, whisk together all of the pudding ingredients.
For creamier, silkier puddings: Combine pumpkin, sugar, salt and spices in a food processor and blend for 30 seconds. Transfer to a saucepan and heat over medium-high. Once simmering in the pot, cook for another 5 minutes, stirring frequently. The mixture will thicken and get a bit darker. Reduce heat slightly and whisk in milk and cream. Off the heat, slowly whisk in eggs.
Both methods: Divide between 7 to 8 ovenproof 5-ounce pudding cups or ramekins on a baking sheet. Bake for 35 to 40 minutes, until puddings barely jiggle when shimmied and/or a knife tip inserted into the center of puddings comes out clean. Try not to overbake.
While they bake, combine topping ingredients in a small bowl. When the puddings are cooked through, transfer to a cooling rack on the counter and leave oven on. Spoon 2 tablespoons of sour cream mixture onto first pudding and use a small offset spatula, butter knife or spoon to quickly (it will get melty fast) spread it over the top of the first pudding. Repeat with remaining puddings.
Return puddings to oven for 5 more minutes, then cool completely at room temperature, about 1 to 2 hours. Chill until ready to serve.